Showing posts with label paint. Show all posts

Thursday, January 13, 2011

Ours is the Most Beautiful House

...at least, on the street, if not farther out. To say the least, that Robin's Egg blue isn't on our house anymore. The painter's finished the day yesterday sooo close to being completely finished with the house and for the first time this week, we came home before sunset and were actually able to see their work. Two days ago, we gathered up all the paint samples that I'd left out on the porch and put the one we'd chosen on the porch rail for the painters to see. But silly me, of course, even though I've been viewing the color choice as an extremely serious decision, I was less than serious when I was quickly moving the samples about before work on Monday morning. I believe I accidentally left the second choice color for the house on the porch. heh. heh. Luckily, choosing between those last two colors was very difficult and I really loved both of them.

Soooo... It not like I'm narrating this in person and you haven't actually seen the final pictures yet but~~~ *drumroll* Ta~dah


Even our garage with its tiny little window looks beautiful.


Maybe you can see (but probably not) that there are a few spots that need some corrective painting . We're not complaining though since it free and goooorgeous. We'll want to paint the trim white around the two back doors, and that small spot on the middle pillar blue. Then, just two harder ones, that we might not do anyway, the top of the chimney wasn't painted for some reason, it's still quite pink but we might be getting the chimney rebuilt anyway, and the rafters on the side of the porch and house would be better white, not that they stand out strangely for being blue. Then, that back porch, ick. But really, in person, you can see that once the siding is taken off it will be fine and it is straight and level, as well, though for some reason it doesn't look it in the picture. Probably because of that siding.

The only thing lacking now is the landscaping and now that the painting is done I can finally plant around the foundations!! Not that I have any money hah.

So to finish...
Come on Google Street View!! I'll let you retake the pictures for our street now.

Monday, January 10, 2011

Paint-tastic

So wonderful news, we're getting a New Years Gift from our contractor! He's painting our house, completely, instead of just priming it like he's required to. So no more pink house! He told us this last Thursday when he came by in the evening and they started painting on Friday. We had already been thinking about the colors we wanted and had grabbed some paint samples from Home Depot probably over a month ago so we gave those to him since he wanted to use a tinted primer. Fine with us, though we did make sure to tell him that we don't know the final color yet. Good thing too cause the colors we pick out were UGH Ugly! Take a look:


Easter candy blue, don't you think? Quite a shock to come home to. Apparently, choosing lighter colors than you would guess you like is something you do for inside paint colors, NOT outside. So over the weekend we went back and forth to Home Depot two times before we had all the paint colors you can see on the front of the porch. But I wasn't really satisfied yet, so I went back one more time Sunday afternoon and pick out three more (total 12 samples = about $48, I think worth it for an exterior color choice) and applied them to the other side of the porch.


Love, finally I'd found the right shade and saturation. I was crazy for both of these colors so spent a ton of time making large swatches to compare. And then, I just couldn't decide. I made Patrick, who was getting quite tired of the process and seemed a bit convinced that I was trying to get the house painted teal, go outside and look at the colors twice before he finally convincingly said that he would like either one of them. So.... I decided as I was going to sleep that the brighter blue that I do very much love might not be acceptable to enough people, or me after it was on the entire house so the one of the left it is.

While I write this now, the men have probably finished spraying the correct color on the house and should be painting the rails and trim the whitish color we chose. Also, today, the men should be taking down the ugly metal awning over the front window. Seen here along with one other dramatic front yard change:


Do you see it in the shadows? No?


No more Port-a-Pottie!! That wonderful surprise greeted us about a week ago. Also, quite a few other things have been completed in the last few weeks. The regrading, new drainage, and concrete around the chimney is finished. It started out like this:


This picture was clearly taken on a dryer week and the problem isn't so obvious but just out of the picture is our chimney - our water trap. One morning after a rain, we took a look at this area and saw puddled sludge, because the water was just collecting there, trapped two inches below the concrete drive, and over the past century slowly making the chimney sink along with the rest of the living room. But now the foundations are a bit taller and the downspouts lead into a buried pipe diverting all the water down past the chimney. And to block any other water from pooling there anymore, we have new sloped concrete over this area.


It doesn't look obvious from the picture but the new concrete is nicely sloped and water won't be collecting there anymore.

Now walking up the drive in to the backyard, we finally have a back porch again!


...it isn't quite what I was expecting... but this is my fault for not drawing up plans for what I wanted. I was pretty much thinking that a small back porch is a small back porch, there's nothing really to explain. Well except the landing, I wanted that to be brick so I did talk with Abel about that and the men built it to the pattern I wanted using the extra bricks that we'd found around the yard. I'm happy enough with that. We'll have two planting beds on either side of the landing so the rough concrete underneath won't be visible. Now the siding however... Don't know why they put that on there. But then I didn't specify that I expected the lower part of the porch to just be open. I thought that later I might add lattice to it the open porch but of all the problems that have come up due to bad communication, this is one of the smallest so I didn't complain. All the side pieces of the porch are just screwed on so we'll just take off the siding sometime on our own.

So anyway, next, to the lemon tree at the back of the garage.


And yes, I know it looks like I just weeded a spot next to the tree but I actually finally planted some of my suffocating bulbs. This patch has about 50 little muscari all over and 5 lily of the valley towards the right side. Then I took my ailing chamomile from the tiny pots I should have removed them from months ago and put them on top for a pretty, mossy cover growth (eventually). Also, good to note is that the muddy pit just visible below isn't full of pooling water anymore, after the week of dry weather, all the standing water has finally drained away and even better, despite all the water clearly flowing down the trenches to the bottom of the yard, the bottom area was dry after only 2 days (not so for the top half of the yard, we still need to do a little digging but we can only do so much on our weekends).

Our last bit of progress is in the back corner of the yard. Here's what the blackberry patch looked like in spring before we had the house, before we'd even been able to cut down the weeds.


You can just see a red spot from a rose buried inside it and an orange spot from a nasturtium. Well, we took down the pear tree the first weekend we had the place because it honestly had no roots and was obviously dieing. But it took until the weekend before last for us, that is to say me, to cut through the rest of the thicket. It took two weekends but now it's almost gone.


Sorry for the bad lighting but then the picture wouldn't be very pretty even in the best lighting. The lump towards the left side is apparently a bush that the blackberries engulfed and I assume, killed from keeping light off it for two or more years. Next to that is the pretty rose that had been throwing up reddish purple flowers during the summer and that now had bright orange hips, looking very healthy despite the brambles. Then, there are the three volunteer trees that I'll just have to get to later... when I've gotten over this cold.

Monday, November 22, 2010

Boring Little Things

Over the last couple weeks, progress has slowly been made. The garage is still electric doorless since the door is a bit rich for our blood, at least until about new year, but there is now a side access door and Abel's part of the job is finished (except for them emptying it of their tools etc).


The french drain is working well, now with it's entire tubing buried and a let-out at the front of our property. Also, I noticed the other day that the drain pipe from the garage is properly connected to it now and so is the drain pipe on the side of the porch. The back porch is in progress now, the men poured the concrete supports about two weeks ago and built the frame about a week later.


Also, you can see a bit from the picture above, but the guys have also been scraping and sanding our house all the way around over the past two weeks. You can see it more dramatically in these two pictures:


And you can also see that our window bars are off! I love the way it looks without them, so much brighter and friendlier. But Patrick insists that we'll have to have them put them back up after the painting because our windows are old easy-shatter ones. But they'll be off again some day once we get the windows updated. Also, on the lower picture, that large dirt plot next to the house isn't there just because the men cleaned up, they cut out a couple feet of concrete so they can repair and regrade. Before the foundation was practically at the same height as the small strip of dirt that was there before.


Now, I was surprised to see the concrete gone in the first place, but not only were they preparing to repair the rotten sills and the grading issue, but I found yesterday that they had actually poured additional concrete on the lowest parts of the foundation on that side.


After that, there are a few more things, but I'll post about them in a few days when I have pictures. In the meantime, so that I have a couple of pictures that aren't so brown and dull, here is how the front garden is doing.


The plants are filling in nicely, it's been a bit more than a month and a half since I planted all these and they're not quite double in size yet but then everything has been slowing down now that it's getting colder.


And in the larger beds, the seedlings are doing even better, only the Lantana is looking a bit scrawny, I think it's waiting for high heat again to burst into growth. I also finally got some of my larger plants in the ground, the Penstemon in the front and Coleonema 'Breathe of Heaven' in the back.

Oh and just for fun - I caught my older grumpy cat being nice to one of our new kittens hehe.

Friday, October 29, 2010

Confused...

Now, yesterday, we came home to find that nothing had happened around the house, but two days ago we came home to find three things entirely unexpected. I haven't been able to talk to Abel yet about it, but as these are extras being done to the place and not negatives, I guess I'm okay... Just don't know what's going on.


1) Gutters - I already knew that we were getting one free gutter on the side of our garage that hangs over our neighbor's yard (because she has been nagging my contractor nonstop). However, I was not aware that I would be getting another one along the other side... And it's not like I can afford to pay for one or that Abel doesn't already know this so... Free gutters! Yay.


2) Drain Pipe - Not the one coming out of the ground there, that's the unfinished end of our french drain which we were fully expecting and paying for. No, the white drain pipe curling its way around our porch. Now, Abel did say he'd give us one new drainpipe... but not here.


Here, where the old one is still attached. He said he'd gift us this even though we don't have the money for full gutters right now, because this one drains water right into our chimney base, probably creating the conditions that made the chimney and front room sink 4 inches in the last hundred years. So... Perhaps there was a bit of miscommunication between Abel and his gutter people.

3) Paint Scraping - Apparently, we paid for a good powerwashing of the exterior to remove the peeling paint. I'm not aware of paying for it but I don't think I'll complain, we were going to do it anyway when we painted the house ourselves next year.


A little annoyed about all the lead paint chips on our soil... but I guess I'll just have to make sure they clean up.

Monday, August 16, 2010

After the Move

So we've been in the house now for just over two weeks and have been able to use our three weekends so far to bring a bit of order to the inside of the house. The outside may still have a lot of construction materials and a very bad looking propped up porch roof, but the inside is organized. (mostly).

Here is our living room the best looking area of the house at the moment. It looks much smaller and more crowded than it really is, partly because I wanted to have the sofas facing each other but not blocking the dining room entry. I really need to get a nice fish eye lens for my camera so it can look like we're living in a mansion. But it really does look smaller than it is.


And here is the beautifully refinished floor that I told you about. So many great lines and colors throughout the wood, it's the exact texture and color I would have wanted if I could have chosen new floors.


And here is the old old heater (or do you call it a furnace maybe?) in between the living and dining room. It may look its age and have a bit of paint on it from the previous owners poor painting jobs but it actually works. Without any modification. Although you do have to use a pair of pliers to turn it on because while there probably was a knob connected to it once, it certainly isn't there now. That goes on the search list - after all, it's an interesting piece and it will look nice once we clean it and paint it a nice nearly black color. Not to mention, best make it look nice and functional as it would cost thousands to remove it.


Here you see the living room from the dining room (bit of bad lighting in the picture, it's not so yellow). I'll agree with Patrick here that the sofa does not look good from this angle, blocking the passage, but it's the best place we can put it. Eventually we'll get a nice comfy chair for that corner and get rid of the loveseat. The blur around the light from the window shows our cheap one dollar shades from home depot. They really don't look bad. Certainly better than some pictures I've seen with sheets pinned up over the window. Once we repair the cracks in the walls and repaint, we'll chose curtains to go with the new colors.

Now, I won't show you another angle of the dining room because, really, there's nothing more to see except the still badly finished built-in and Patrick's messy electric piano.


The bathroom, however, is coming along - compared to the gutted hole from before. We have all the necessities - which is nice as I swore when I first saw that port-a-pottie in our yard that I would never use it. We have our brand-new clawfoot tub (in the end, after looking everywhere the only reasonable option - and easily the cheapest - was to buy new). You can see our beautiful tile and the old mats from our condo bathroom. You might also be able to see the gaping hole in the wall. That is where the previous owners had a toilet roll holder - our contractor removed it but I guess it took the wall with it. We want to eventually take off the remaining bead board and put up new stuff with a better technique. The other guys just tacked in up and left nail heads visible everywhere. It seems so stupid. I figure use screws at the very top under where the cap will be and at the very bottom under where the baseboard will be. But no accounting for all the crap they did.

Now look at the pictures below to find out what my little Stiggy's favorite thing to do is.


She is a real bathroom cat. The moment I'm even walking to the bathroom, there she is trying to squeeze herself in. And as we don't actually have a door to our bathroom right now, she has free range of it. It's really quite adorable, she's never more affectionate and playful than in the bathroom, she's always been that way. In the picture above she may look like she's just lounging about but she's rolling around and purring like crazy. I just barely got a picture in focus.

Anyway,


Here is the make-do kitchen. We have most of our appliances now, a new refrigerator and dishwasher. We got both at the Sears Outlet in San Leandro and they make me so happy, knowing how cheap they were. You know it's quite odd having a built-in dishwasher without the surrounding cabinet. Can you say over balanced? I'm pulling out the top rack, loading it for the first time and it begins to tilt, and I'm too slow to react so the bottom rack flies out and onto the ground in. Luckily all of the breakables already in the rack were okay. We now have a very heavily filled suitcase sitting on top of it.


See here our make-do oven, range, cabinets, workspace i.e. the table and floor i.e. the cardboard boxes laid about the room. But we've been over to Home Depot and planned out our future kitchen now and maybe this next week one of us will visit our credit union to see if we can get a two or three year loan to make it easier to afford. Our plan is for a kitchen as economical as possible while still looking good for resale.


We had chosen this style with MDF doors but then noticed that the white finish is applied after the door is put together making the corners and edges look really bad, so we changed to the painted maple which felt great under our fingers. It was an upgrade of about $1500 but the MDF was really ugly so I can't imagine the next buyers thanking us for the kitchen remodel. The countertops will definitely be of stone... eventually but to save the $1700-2000 it will cost, we'll put in laminate for about $200 and upgrade in a year or so.

Moving on...


Here's our new back of the kitchen configuration. That new corner houses our water heater, accessible from the outside only. Obviously, our laundry next to that, no pedestal for the dryer yet. But, really, no dryer yet because that one is electric and silly me, we don't have the correct 220 hook-up. So we're currently waiting for a good gas dryer to pop up on the Sears Outlet website in our itchy clothesline clothes. We'll get that one returned when we find the replacement and hopefully we'll get the restocking fee waived by buying the new one in the same place.


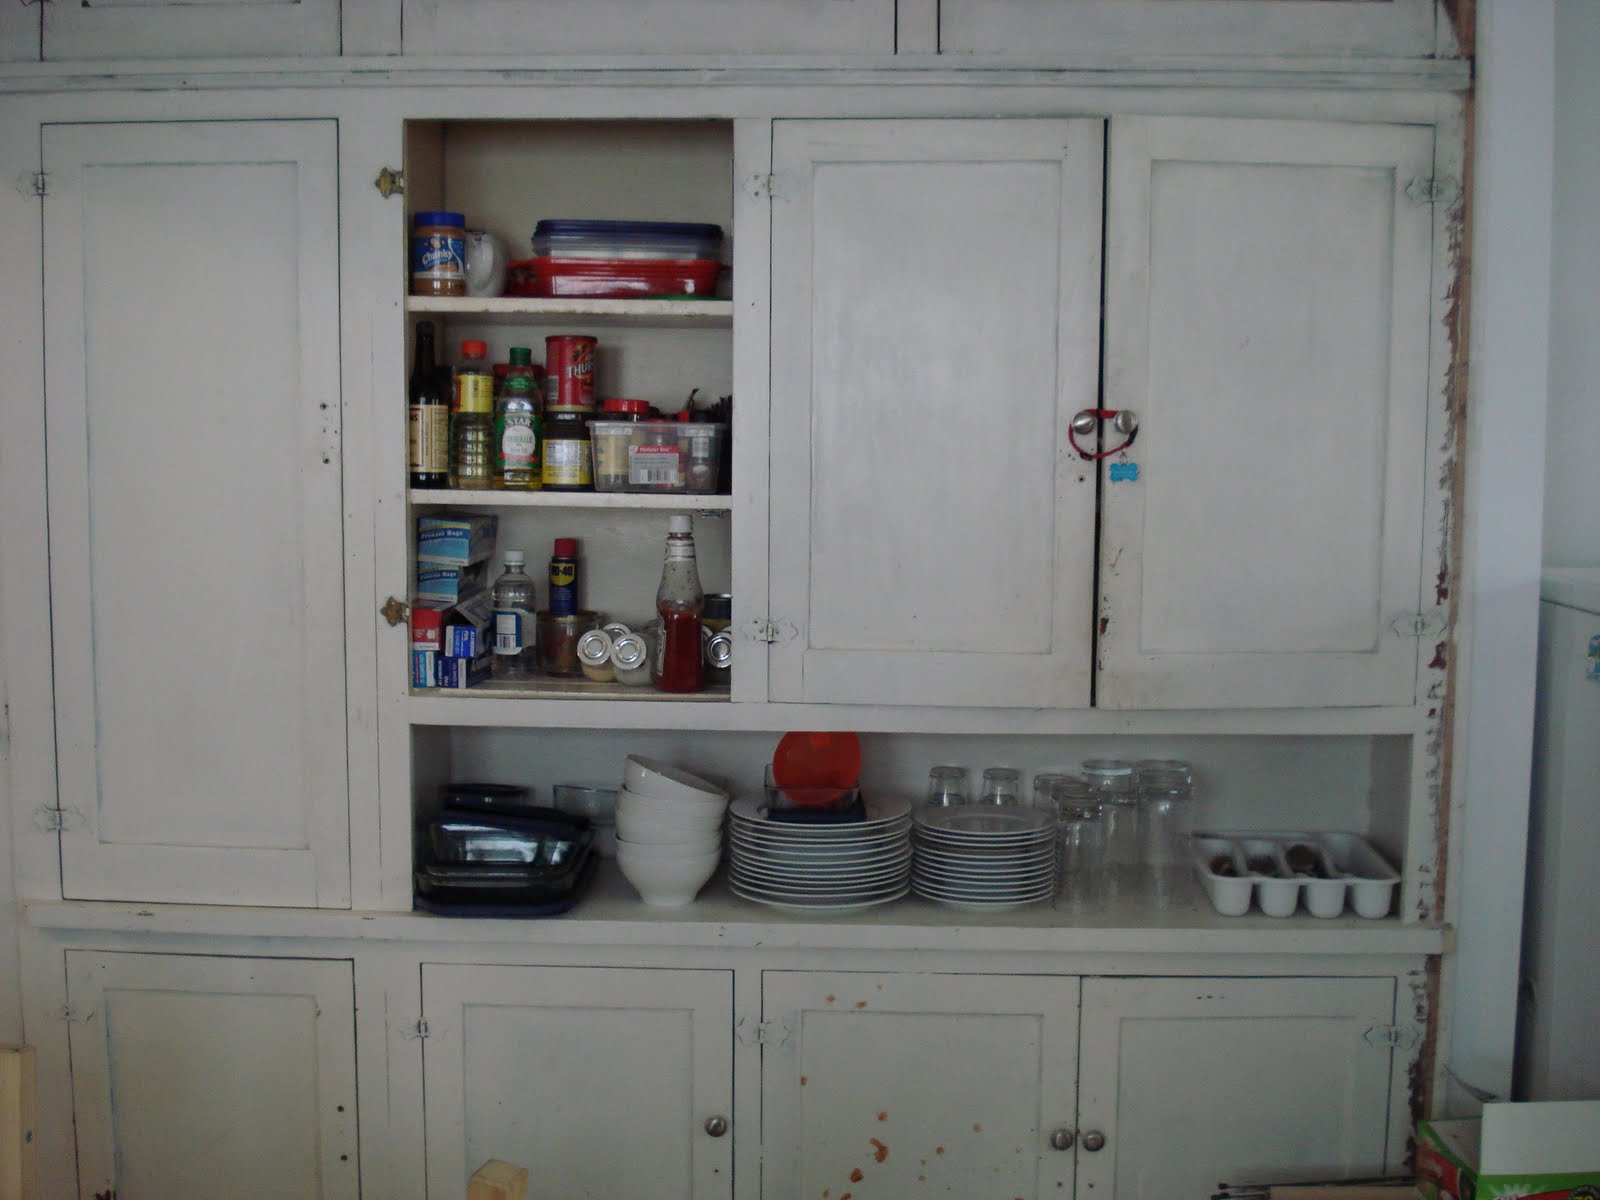
Next, our badly badly painted built-ins. I finally started my first DIY project - refinishing our kitchen built-ins. Above you see our first door missing. I used a heat gun to strip off the four layers of paint on the backside of that door - every color horrible to imagine. Then, after getting practice on the back of the door I turned it over and found out that there was only one thin layer of white paint on the outside. So the other owners took care of the nice finished outside of the cabinets up until the last poor paint job. And the wood for the cabinets - now I'm not exactly knowledgeable in this area but I think it looks like a beautiful redwood. You tell me. You can only just see the clean sanded wood in the picture below on the left side door.


These two doors show the progress we've made so far. I stripped the back of the left one to where it looks like the far right side of the right door. The right door is the interior side of one of the doors. I half stipped that with the heat gun and then we tried out a chemical stripper. When I found out that there was only one layer of paint on the outside of the doors, I also found out that the heat gun doesn't work very well on such a thin layer of paint. So as I went on to the next door, Patrick tried to sand off the thin layer which worked pretty well - you can see the smooth sanded middle of the door. Then, he went to get a chemical stripper to see if it would work any better. It was definitely easier - the part surrounding the sanded middle is what we had after two chemical layers were scraped off. He also tried it on the rest of the door that I was peeling and it worked quite well but I prefer using the heat gun I think.


In the closeup you can see the residue of the mushy paint which is left behind after scraping the chemicals off. With some washing I guess it will all come off but I kind of prefer the slow gentle removal using the heat gun. Though as we plan to paint the cabinets white again, we can probably just lightly sand the outside of the doors and cabinets and then repaint (still stripping the inside because there are so many layers).

Also, while I was using the heat gun earlier in the day, I was quite close to the paint on the outside of the house so I got a little curious and aimed the gun at it for half a minute. When it started to get all bubbly I scraped a bit off and found out that the pink isn't original. It seems our house used to be a very nice canary yellow. I would have much preferred that. Not that I've changed my mind - I still want blue in the future.