Wednesday, December 29, 2010

Even More Water

As forecasted, Oakland received just over two inches of rain during the night. Did our newly dug trench survive the night, did it move the excess water away from the boggy top of the yard? Yes! And it still is!


Looking just at the sky, one would think that the rain has stopped already but our property doesn't seem to understand that. There is so much runoff from the hill behind us that we have a proper creek of water running down our trenches. And it's so sweet! I was a bit mesmerized looking at the tiny babbling brook this morning, watching the light bounce off it as it swirled about to the end of the system where it then made it's own eddy across the flat mud where our patio used to be and curled toward the back gate at the side of the house, like it actually wanted to join the french drain buried just below.

So these pictures show the rest of the system that I was too tired or lazy or muddy to take pictures of when we finished it on Sunday. After the trench drops down to the lower level of the yard, it goes down a bit and then we decided for a bit of whimsy, it splits in two and we have a little island. We will probably make a cute little bridge to go over it or maybe two. We will need to work a little bit on the leveling though so that the water flows more easily into the inner branch, right now the only water in there is the back up from the end of the trench. Also, can you see the silt (or debris left in the trench from our digging) that has traveled all the way down the yard to try and clog the lower branch.


In the second picture, you can see the water edging ever higher in the trench till it overflows at the end flooding this new area of the yard! But this is what we were aiming for. Even without the rest of the trench dug out the water is continuing to flow down and is leaving the yard in the french drain put in by our contractor.


Tuesday, December 28, 2010

Far too Much Water

So this weekend, I was finally set to stop procrastinating and fill our green bin with blackberry brambles. And I did, as much as could fit at least, which happened to be a bit less than half. In the process of pulling and separating the amazingly long canes (some twisting nearly a dozen feet), I found some oddly high tangles of grass, right in the middle of the brambles, surrounding flat depressions of grass... kind of like a bed... It was empty when I found it but this must have been a nest for something big - maybe raccoons or opossums?


Recently, we've found some rinded lemons sitting around the yard, like rodents have eaten the sweet skin and left the sour flesh - my coworker rents a place with garden full of rats that do a similar thing.... but luckily she said that they always leave a mess of lemon peel bits around the part they leave behind and my thieves are very clean, taking every piece with them so I'm crossing my fingers that it's just squirrels or raccoons. Anyway, I don't think they've been living in our blackberry stand for a while now or at least hopefully they won't be coming back now that I've open their nest up to the cold.

So while I packed our bin with the thorny thorny canes, trying to not get pricked, I glanced over to our back planting bed and noticed (for the second or third time) that standing water had collected in the left side of the triangle. I wasn't happy the other times I'd noticed this but didn't have the time to deal with it, this time I decided that now that the bin was full, I should try to fix that problem, too. Here's the first picture I took, sadly after I'd taken a couple spadefuls out but the problem is still obvious:


A few minutes shoveling didn't take care of the problem so I kept going, discovering more and more water just barely under the boggy ground I was standing on. At the least, you can see below that the standing water has moved away from the roses, pelargoniums, and lavender that were probably drowning a bit.


Now the other side didn't look bogged down but if I was making a drainage ditch for the one side I wanted it to do it's work on the other side as well. Also, I noticed that much more water came out and gathered in the areas I had dug already than one would think possible so I figured something would appear even in the dry looking side. And it did, but there's no good pictures to show off the digging I did for the rest of the night, well past sunset (I haven't been that enthusiastic digging ever, I think). And eager to get started on Sunday, I came out to take a picture of any continued flooding the next morning.


And yes, I did all this awesome trenching with my own girlishly weak arms. And all the horrible mucky, muddy mess, that's mine too. It was also all over me the night before and destroying the only pair of shoes I really wear, some little black flats, that I'm now wearing, even though they're still a bit caked. Feeling that after the night before, flats with no tread and very little waterproofing power weren't the best footwear to continue in, I went with Patrick and we both got some wellies (or galoshes if you prefer) to work in.

This time, I dragged in Patrick to lend his more powerful, less sore muscles to the trenching. Together we were able to get the trench continued all the way to the end of the grass in the lower part of the back garden. Very proud of our weekend work, although it is true that I'd hoped that I'd finally get the rest of my bulbs buried and my maybe some of my new plants - Christmas Eve nursery trip, my present! - in the ground.

Still, this means we're finally started and even halfway done on one of our many projects. Now that the trench is dug out, we just have to get gravel and rocks delivered so we can make our dry creek bed. In my original plans I didn't have the creek going up into the top garden but I think it will be better this way. Now our large decomposed granite flat space up top will be bisected by a cute little creek and we can place flat flagstones for steps across it. Also, any worry about bogginess in patio area up top will be taken care of.

But anyway, one to two inches of rain is forecasted for tonight so I'll take more pictures tomorrow that include the second part of the trench and we'll see if it survives the night and serves its purpose.

Thursday, December 16, 2010

Weeds and the Lemon Tree

I don't have so much to add after my last post, just a couple pictures to post. I've mentioned before that I knew the top of my garden was weed infested and that I had even seen some of those nasty Oxalis clovers next to the fence when first viewing the house. Well... there is quite a bit more Oxalis than that. See:


It is all located in the top of the garden at least. The ugly retaining wall kept them all up top I guess. And, well, anticipating weed growth spurts (though not this much clover) and the inability to pull them all in good time over the winter wet season, I laid out some extra cardboard in the top left side of the garden that we had from moving. They're now nicely soaked, starting to breakdown and working wonderfully.


I pulled some up last week to see what was underneath: dead yellow grass and spiders, of course, but also long yellow Oxalis that was obviously trying to find the sun and failing spectacularly. The uncovered clovers are very happy and green and I've pulled some of it - many buckets full but it's just too much for the dry time I have to devote to the chore. Luckily, we are planning on eventually having a large central gravel area in the back and a pergola with pavers underneath. Also, the one bed we have dug out is almost completely clover free. So digging helps remove the clovers. Go figure.

The second thing, obviously has to do with the poor lemon tree I wrote about in the last post. Well, just to better illustrate why we must take the drastic action of topping the tree in order to help it recover, I want to post this picture that was hiding on my home computer of the very spot that is the tree's main problem.


Enlarge this one if you doubt our reasoning. You can see that the previous owners topped the tree at the now enlarged spot. When the main leader of a tree is cut, or topped, the resulting sprouts fight to become the new leader growing oddly thick compared to normal lateral branches, and you can see on our lemon that there were branches that sprouted out in all directions from the beheaded trunk and the branch to the left sprouted a perpendicular branch which became the new leader. But topping a tree doesn't make pruning easier but more and more often necessary. These guys didn't follow up (and well, they never should have topped the tree in the first place) so all the side the branches from the topped spot grew bigger and more distorted, running into each other and warping. Eventually the one to the left cracked away from the replacement leader because it was too weak to support the weight of its canopy at the angle it had sprout from the trunk at.

So, as I said in the last post, there are just a few options open to us:
  1. Let well enough alone. The tree produces well over a hundred lemons a year, it seems. Downside, it's inevitable that other branches will eventually crack away and fall, hopefully on the ground, eventually killing the tree. Also, the tree would continue to be an eyesore.
  2. Chop down the tree wholesale. Seems a pity though to waste such a well established and well producing tree.
  3. Prune the tree to help keep the branches from becoming overburdened. Though, this will likely encourage growth and so might not prevent #1.
  4. Drastically prune the weak members and joints away. And as the entire structure of our tree is terribly weak, this means topping the tree down to just below the previous top point. AND unlike the previous owners, we will properly prune after the cut, encouraging limited stable growth.

Monday, December 13, 2010

Weekend Gardening

I was so so happy that the weekend arrived and it was actually dry like they said it would be. I've had a great desire to be out working in the garden lately but by the time I get home on a weekday, the light is already going. I'm barely able to look around and see if work has been done on the house while I've been gone. But this weekend I was able to get out and do some work. Muddy work, but overall very satisfying.

For the past month or so I've been telling myself every time I go out to the garden that I'm going to get my pruners and chop down the big strand of blackberry bushes in the back corner of the yard but easily distracted as I am, I haven't so much as touched one of the canes despite going out 5 or 6 times since my resolution. This time I distracted myself with the mound of grass, weeds, and clay that I had heaped up in mid-summer to dig our solitary flower bed in the back of the garden.

Our flower bed has since expanded in both directions but the heap has remained. I thought it might naturally form a small hill once the rains started to come. Instead, it stubbornly remained a lumpy heap, which I have to admit I was actually quite sure would happen. You can kind of see it, lazing there in the picture below from mid-October.


Since the rains started, it has also started to sprout a new growth of weedy geraniums and grasses (luckily no oxalis, the bulbs must be buried deep). And since there was also a couple inches of original grass between it and the finished bed that have been trying to spread into our precious, clean flower bed, I decided to procrastinate on the berries, by hacking at the heap this weekend. Also, it's the low impact, easy on the muscles kind of gardening I especially like. So here it is, after picking it apart for two hours or so, it was finally a nicely manicured little hill behind the flower bed.


The lump was kind of resting against the bottom few inches of the fence for these 5 months so you can see the dark soaked wood behind it... I know, very bad of me, very unneighborly... but looking at it again on Sunday, dried out, it looks like that area of the fence is in no worse condition than the rest of it.

Also, sidenote - I cut out the two overgrown Coreopsis plants I had between the Agastache and Foxglove. I also cut down the Agastache and harvested the seeds a week ago. I don't know if the Coreopsis will come back, it might, the roots look very healthy, but if they do I'll move them to a new place. The Agastache and Foxgloves next year should be enough for that part of the bed.

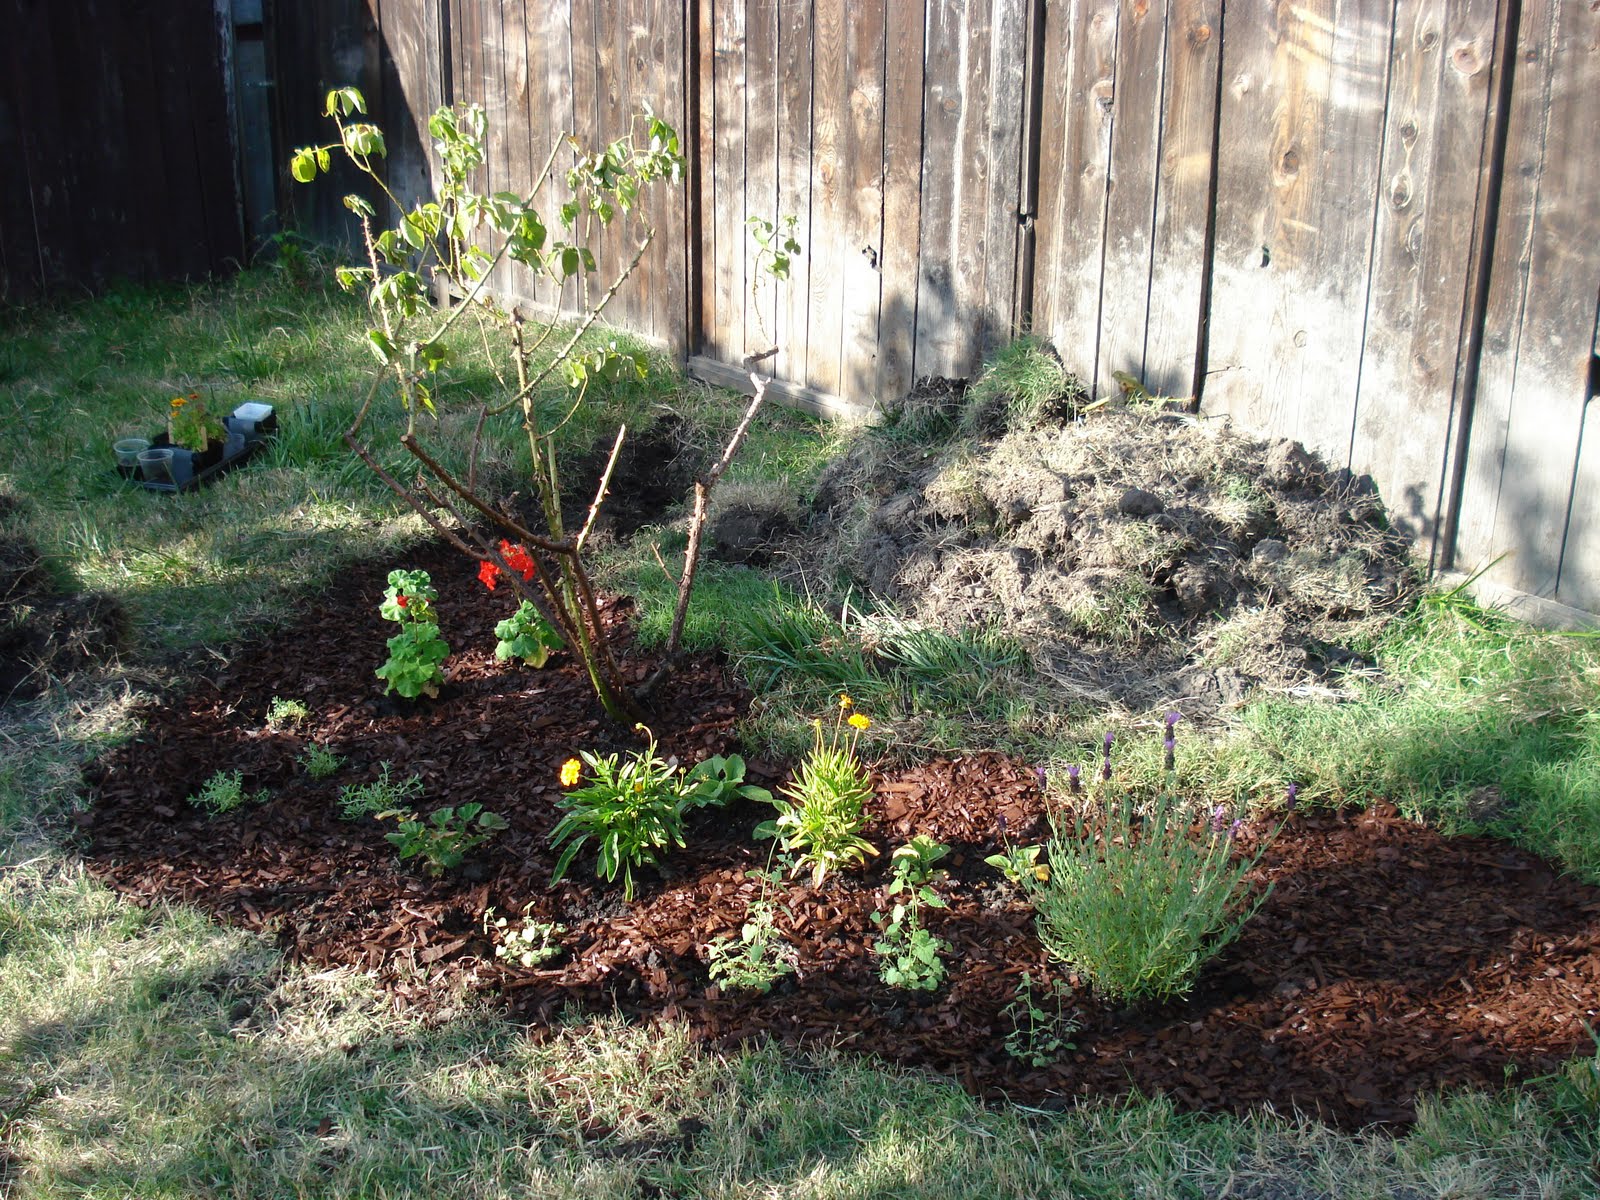
And so, Sunday! Having conquered the heap, I decided I must now use it like I originally planned to. Now, the lighting is pretty bad but here:


That's a very well shaped, at least I thought so, Ceanothus 'Dark Star' sitting on top of the heap. I've always wanted to plant one in the back garden, so this is what I was thinking when I originally made the heap. I've read that a little additional water in the summer can be good for it but that too much can kill it and that it needs to be in well drained soil, so I think it will do well there. Also once it expands into a small tree, it will go very well with the two roses in front and next to it. While the roses are cut down and resting for the winter, the Ceanothus should be in full bloom, winter to spring. Then as it turns into a normal evergreen shrub after the bloom, the roses will take over.

And so the back flower bed is starting to take proper shape. I want most of the plants in the top of the yard to need little water: Agastache, Lavender, and Ceanothus. This next year, I plan to add native wildflowers and shrubs, a pergola and wisteria, a redbud, a Black Oak, and a large dry space in the middle with Decomposed granite or something similar.

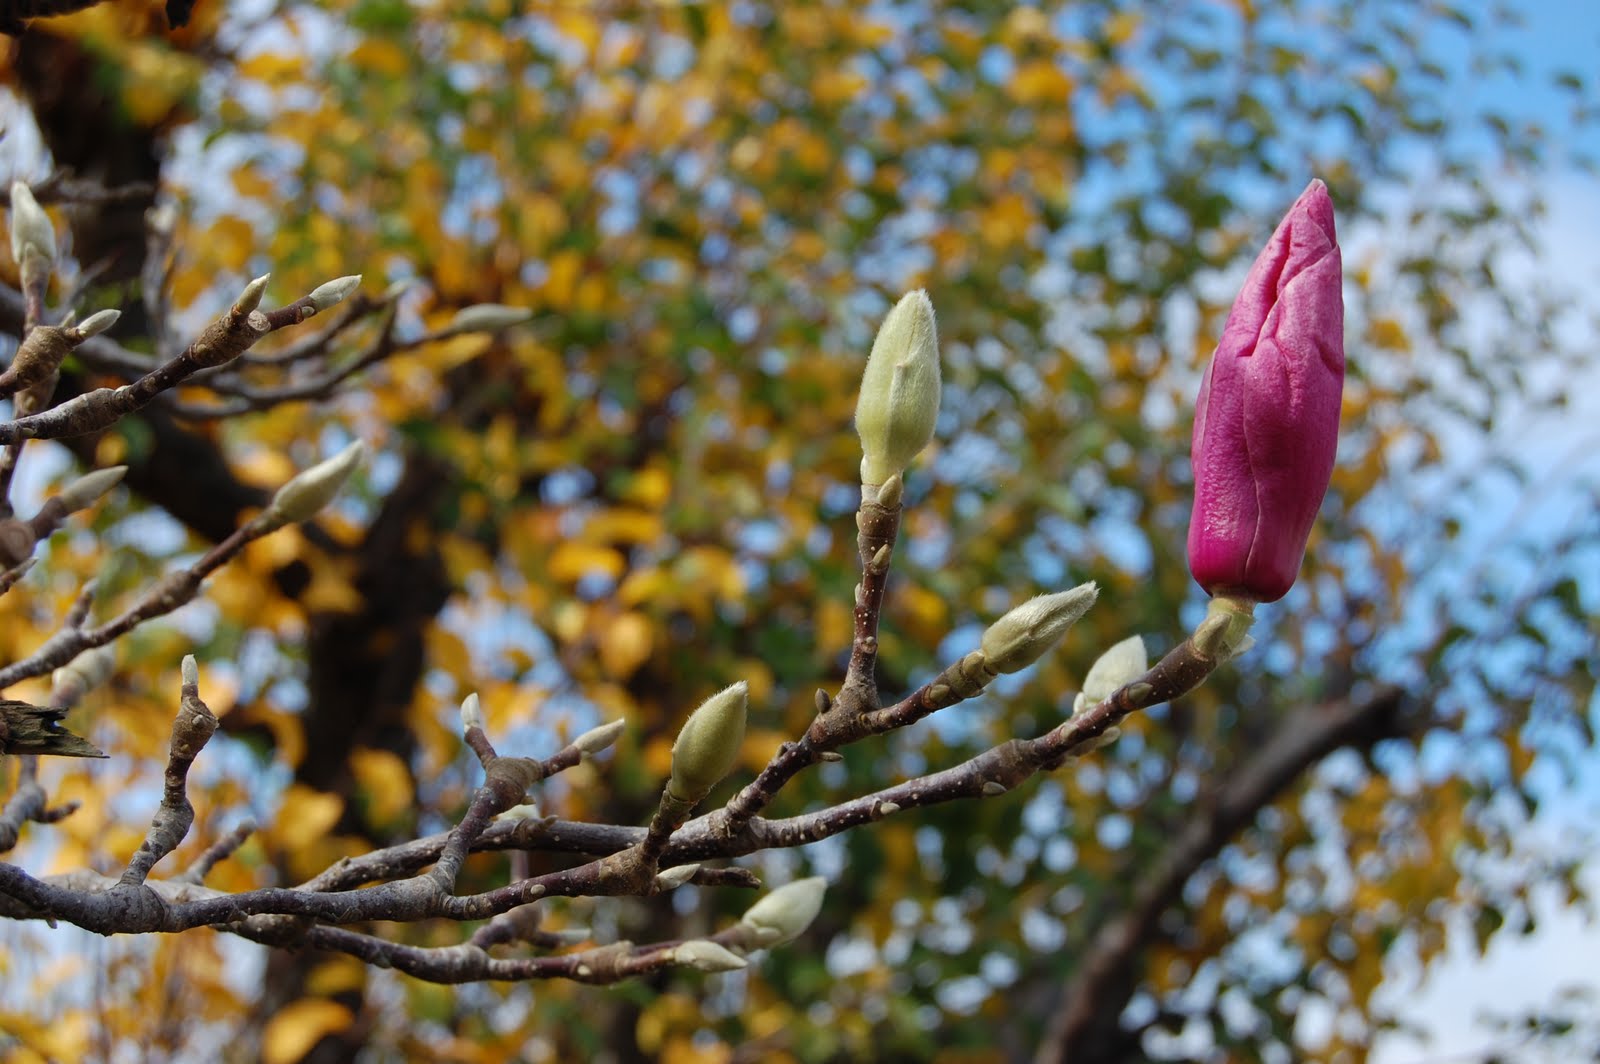
There are already two trees in the back of the garden: a deciduous magnolia and an ornamental lemon. While I was lazing about in between weeding this weekend, I stared off into space in the tree's general area and noticed that a few of the blossoms are starting to open!


There are three or four buds nearly ready to open. In fact, I checked again briefly last night and this bud had open about 2 1/2 inches at the top. I'm glad to see that the drought stress inflicted on it during probably the last 5 years hasn't injured it too much. Last year, I saw beautiful blossoms in March, when I first saw the house, but forgot to take pictures so I still don't know what type of magnolia this is. Once I get some fully opened blossoms I'll probably be able to finally identify it. At first, we weren't sure if we'd want to keep the magnolia, as it isn't in the best of shape but I think if it survives our restorative pruning, we'll keep it. What do I mean? Well here are the biggest problems with the tree:


One of these took care of itself (kinda?). The lower rotted limb just fell off when I touched it one time. It did leave a rotted hole in the trunk like the one in the middle of the picture though. Obviously there used to be a branch there, where it went nobody knows. Then, there's the crossing branch in between the two main trunks. We finally bought a reciprocating saw this weekend, via Craigslist ($50! At home depot, the exact same one for $149.99) so we took care of that and a couple of crossing branches above. What to do about the rotting holes, no clue...

But on the subject of trees and pruning, we did something else this weekend that is probably... not so good... So our Lemon tree! Wonderful lemons, even last week we picked two for cooking, but the body of the tree is about beyond repair. Originally it looked like this from one angle:


After some basic pruning, there was this:


And as we didn't have a reciprocating saw yet, we left some stumps on the tree to clean up later. This Sunday, we started at it. Sawing off those bits first and the ends of some rather less stable look limbs and branches that shot off into the canopy 6 feet... and we kinda... didn't stop.... By the end of the day we had this:


Now, we didn't just go crazy with saw rage. Patrick and I were talking it through, trying to find what was best for the tree... But all we could conclude is that no matter what cuts we make, if we thin out the canopy and cut the ends of branches to promote stronger growth, there would still be a very unstable base structure. For example, the front right branch we cut off extended another 4 feet out from the trunk at a very low angle and then had a very heavy canopy depending on it. If we cut back just the top growth of that limb, it would grow back and become thicker and heavier than before, eventually causing the limb to snap at the trunk. So we cut it to short enough a length that the limb, at that angle, should still be able to support new growth year after year. We had to do the same for two other limbs... obviously...

The final step will be to commit the biggest pruning sin ever... topping the tree... We're planning on cutting it just below the horrible knot you can see if you look closely at the second picture I posted. As this is a citrus tree, something that is very often pruned hard, and it's already in very bad condition, I think this is the only way to help it. I can't be sure what the previous owners did to this tree over the years, but I think it was topped before right where that knot has formed. I think as long as I carefully thin the new growth, selecting the branches growing in the best directions, I think it will become better than before. It has to, heh.

So, it will be topped.

Monday, November 29, 2010

Modernizing

Almost two weeks ago now, we finally got a kitchen floor. So simple and such a pain to be without. Although I've already had to get on my hands and knees to clean up dirty little footprints left by one of our new kittens.

We've been in the house since July but the floor so far has been the bare floorboards left after the men took out the old grimy brown and orange linoleum.


Imagine the loose plywood in the bottom bit of the picture removed and that has been our floor. The bare redwood planks wouldn't have been too bad but the men only removed about half of the papery substance stuck to the floor beneath the old linoleum (just one of many shortcomings I've found, sigh). But now we have shiny new linoleum floor in a much more pleasing, mostly white pattern with black accents. I asked for checkerboard black and white but it wasn't in stock Still, installed, this looks very nice.


Try not to be critical of the mess, Patrick and I made separate dinners the night I took this - twice the mess. And I don't think I'll post the picture that shows the majority of the mess in the other corner of the kitchen.

So the next step we took to modernize the house took about all of Friday. But first, we decided on a bit of a whim Wednesday night that we needed a proper workspace to prepare Thanksgiving dinner for ourselves and my brother so we went to Ikea to buy the kitchen island we've been craving for at least the last two months. However... after spending a good hour there, we go in the warehouse to claim the 3 boxes for it and find it's sold out (very angry...).

And well, thwarted in our fun spending, we were considering going back to Ikea on Friday but with the nearly freezing temperatures we've woken up to inside our house in the last two weeks, we thought... better idea! Insulation! I had told my coworker last week that we had absolutely no insulation and her incredulous stare and repeated "Really!?" got me thinking... maybe Abel didn't say no insulation... so I asked Patrick to get on the ladder and look up there Wednesday night.


On the plus side, don't our rafters look nice and strong. So on Friday we went to Home Depot, very glad to find out that the insulation blowing machine was available and we bought 10 bags of fluffy pink fiberglass blow-in. With 10, just enough for R25 to R30ish through our whole attic, we got the machine for free for 24 hours too! We had to rent the Home Depot truck to get the stuff to our house but we did it in one trip and it didn't even rain so that was nice. And about 5 hours later, at least an hour and a half of that as preparation, our attic looked like this!


We put in barriers around all our pot lights and the shower vent and had to dig out the fluff that went in there anyway. Also, I was vacuuming bits of fluff that had traveled all around the house for the next two days to be sure that cats didn't try to eat anything but overall, between the two of us, it went smoothly and wasn't too difficult, only enough to make us quite sore. Patrick had the worse part of doing the blowing and crawling around the attic but my loading the machine and getting things for him was enough to make me hurt too, although maybe only half as much as him.

But it was definitely worth it. A week and a half ago, I woke up and turned on the portable heater to see it tell me that it was 39 degrees in the room. But this morning when we found ice covering our poor car outside, the bedroom before I turned on the heater was 47. Doesn't sound great but I'll take those 10 extra degrees if I can have it! In a few months, with a bit of money saved up, maybe we'll hire some people to come blow insulation into the walls and spray the underside of the floors. Then, our house will be a cozy little oven.

Monday, November 22, 2010

Boring Little Things

Over the last couple weeks, progress has slowly been made. The garage is still electric doorless since the door is a bit rich for our blood, at least until about new year, but there is now a side access door and Abel's part of the job is finished (except for them emptying it of their tools etc).


The french drain is working well, now with it's entire tubing buried and a let-out at the front of our property. Also, I noticed the other day that the drain pipe from the garage is properly connected to it now and so is the drain pipe on the side of the porch. The back porch is in progress now, the men poured the concrete supports about two weeks ago and built the frame about a week later.


Also, you can see a bit from the picture above, but the guys have also been scraping and sanding our house all the way around over the past two weeks. You can see it more dramatically in these two pictures:


And you can also see that our window bars are off! I love the way it looks without them, so much brighter and friendlier. But Patrick insists that we'll have to have them put them back up after the painting because our windows are old easy-shatter ones. But they'll be off again some day once we get the windows updated. Also, on the lower picture, that large dirt plot next to the house isn't there just because the men cleaned up, they cut out a couple feet of concrete so they can repair and regrade. Before the foundation was practically at the same height as the small strip of dirt that was there before.


Now, I was surprised to see the concrete gone in the first place, but not only were they preparing to repair the rotten sills and the grading issue, but I found yesterday that they had actually poured additional concrete on the lowest parts of the foundation on that side.


After that, there are a few more things, but I'll post about them in a few days when I have pictures. In the meantime, so that I have a couple of pictures that aren't so brown and dull, here is how the front garden is doing.


The plants are filling in nicely, it's been a bit more than a month and a half since I planted all these and they're not quite double in size yet but then everything has been slowing down now that it's getting colder.


And in the larger beds, the seedlings are doing even better, only the Lantana is looking a bit scrawny, I think it's waiting for high heat again to burst into growth. I also finally got some of my larger plants in the ground, the Penstemon in the front and Coleonema 'Breathe of Heaven' in the back.

Oh and just for fun - I caught my older grumpy cat being nice to one of our new kittens hehe.

Thursday, November 4, 2010

Why I was too busy...

...to work on the house this weekend


Bluebell and Cookie snuggled up on Patrick. (He's the cause of all this! Not me!)

Friday, October 29, 2010

Confused...

Now, yesterday, we came home to find that nothing had happened around the house, but two days ago we came home to find three things entirely unexpected. I haven't been able to talk to Abel yet about it, but as these are extras being done to the place and not negatives, I guess I'm okay... Just don't know what's going on.


1) Gutters - I already knew that we were getting one free gutter on the side of our garage that hangs over our neighbor's yard (because she has been nagging my contractor nonstop). However, I was not aware that I would be getting another one along the other side... And it's not like I can afford to pay for one or that Abel doesn't already know this so... Free gutters! Yay.


2) Drain Pipe - Not the one coming out of the ground there, that's the unfinished end of our french drain which we were fully expecting and paying for. No, the white drain pipe curling its way around our porch. Now, Abel did say he'd give us one new drainpipe... but not here.


Here, where the old one is still attached. He said he'd gift us this even though we don't have the money for full gutters right now, because this one drains water right into our chimney base, probably creating the conditions that made the chimney and front room sink 4 inches in the last hundred years. So... Perhaps there was a bit of miscommunication between Abel and his gutter people.

3) Paint Scraping - Apparently, we paid for a good powerwashing of the exterior to remove the peeling paint. I'm not aware of paying for it but I don't think I'll complain, we were going to do it anyway when we painted the house ourselves next year.


A little annoyed about all the lead paint chips on our soil... but I guess I'll just have to make sure they clean up.

Thursday, October 21, 2010

Walls and a Tiny Window

The shell has now been covered up in a mix of the old and new siding and everything is nearly complete with the garage.


I would say it is all just in time for the rain but the roof is still just bare boards. But then, I know Abel is at the site right now working on the french drain across the property and he promised he'd get the roof at least waterproofed, if not finished, by the weekend.

So there's the big update, all finished. We also have nice big flowers around the place - the Salvia Leucantha now has long purple flowers and that first rose we transplanted is now in full bloom mode.


The roses are definitely more yellow and pink this time around, maybe next year they'll have the red orange tones I loved from before we transplanted it. On the plus side, the flowers seem bigger and healthier than they did earlier in the year. Compare the first two new pictures to the last one, I swear that they're the same rose and these pink-yellow guys aren't coming from suckers, not possible.


Lastly, to perhaps make myself find some time Saturday to dig more in the front yard, here is a picture of the sad little plants waiting to go there.